Frigidaire 316207529 Scheda di controllo del forno, m, nero, medio

Brand:FRIGIDAIRE

3.8/5

424.97

DESCRIZIONE DEL PRODOTTO La scheda di controllo e l'orologio Frigidaire di alta qualità (316207529) monitora la temperatura e controlla il calore del forno. La scheda di controllo e l'orologio hanno un orologio elettronico/display del timer e sostituiscono 316207509, 316557529. Si prega di essere consapevoli del fatto che si consiglia di utilizzare attrezzature di sicurezza e di scollegare l'apparecchio da tutte le utenze prima di qualsiasi intervento di manutenzione o riparazione. Si prega di fare riferimento al manuale del proprietario per confermare i numeri di parte e per le istruzioni poiché alcune riparazioni richiedono il completamento di un professionista dell'assistenza qualificato. DAL PRODUTTORE Questa è una parte di ricambio originale. Il numero di modello e il nome del seguente articolo sono: Frigidaire 316207529 Scheda di controllo del forno.

Questa è una parte di ricambio originale. Modello del produttore n. 316207529. Articolo Frigidaire. Con Frigidaire, puoi essere certo di ricevere funzionalità senza sforzo e materiali di qualità, offrendoti prestazioni di altissima qualità per la vita dei tuoi elettrodomestici. La scheda di controllo e l'orologio Frigidaire di alta qualità sostituisce 316207509, 316557529. Frigidaire 316207529 ha un orologio/timer elettronico. La scheda di controllo e l'orologio Frigidaire monitorano la temperatura e controllano il calore del forno. La scheda di controllo e l'orologio Frigidaire è una parte originale OEM (produttore di apparecchiature originali) progettata e progettata secondo specifiche esatte.
Batteries Included? ‎No
Batteries Required? ‎No
Color ‎Black
Country of Origin ‎USA
Customer Reviews 4.7 4.7 out of 5 stars 137 ratings 4.7 out of 5 stars
Domestic Shipping Item can be shipped within U.S.
International Shipping This item can be shipped to select countries outside of the U.S. Learn More
Is Discontinued By Manufacturer ‎No
Item model number ‎316207529
Item Package Quantity ‎1
Item Weight ‎1.3 pounds
Manufacturer ‎Frigidaire
Part Number ‎316207529
Product Dimensions ‎1.5 x 2.5 x 3.5 inches
Size ‎Medium
Thickness ‎11 Inches

3.8

6 Review
5 Star
85
4 Star
9
3 Star
2
2 Star
2
1 Star
3

Scrivi la tua recensione

La tua mail non sarà pubblicata. Tutti i campi obbligatori sono segnati con*

Scritto da: Amazon Customer
Fixed our Oven - Very Happy!
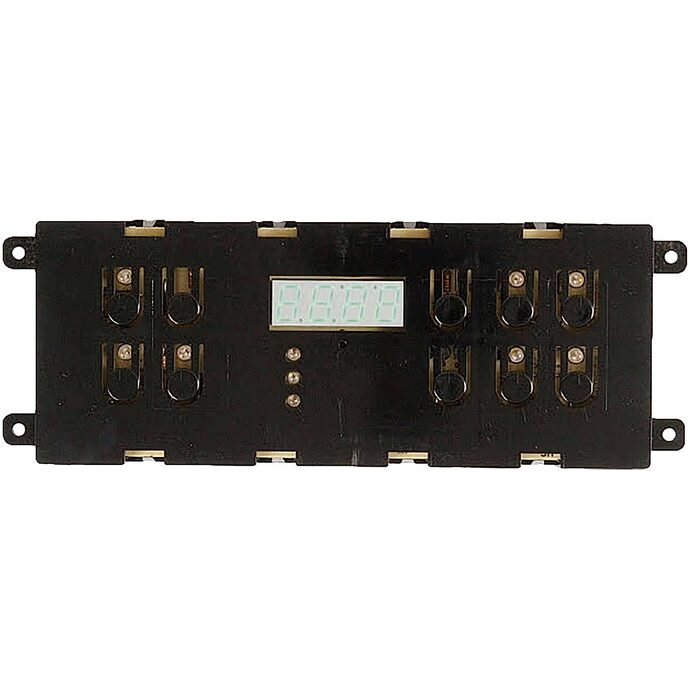
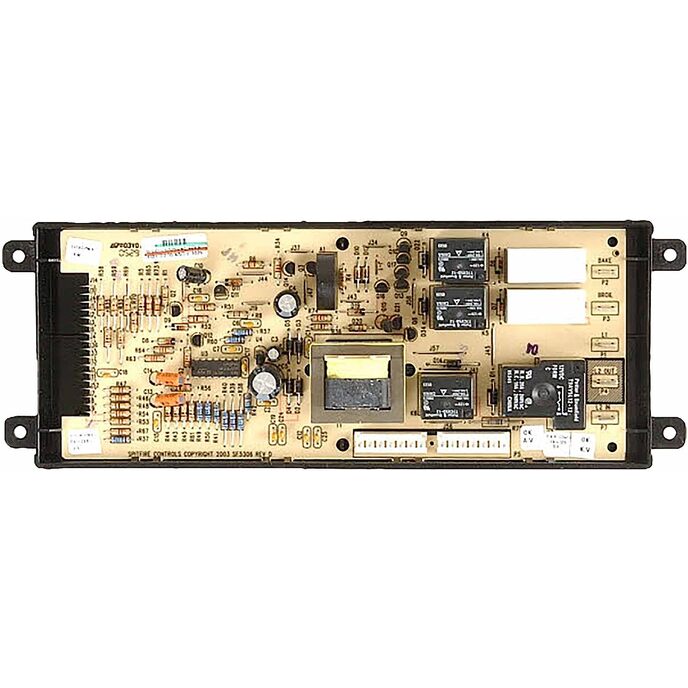
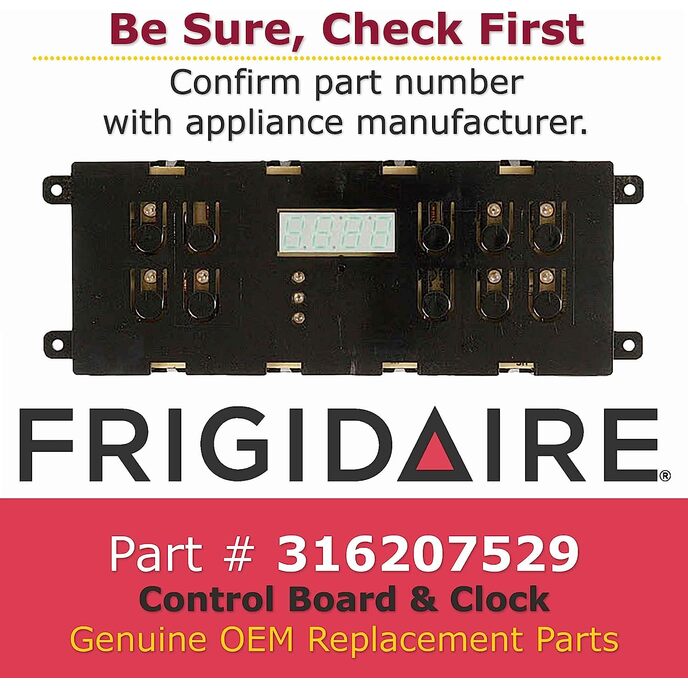
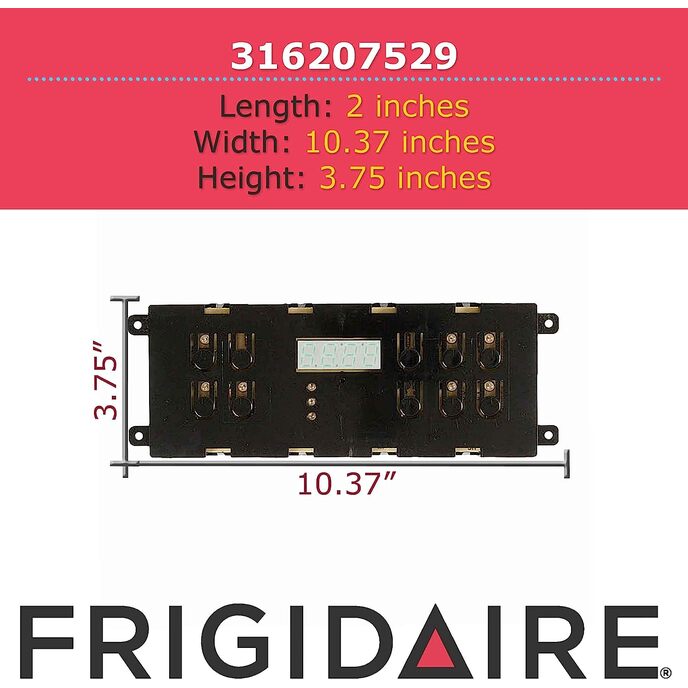
This unit was installed over two months ago, which I waited to see how it performed before writing a review here. The good news: It fixed the issue and has been performing flawlessly across a variety of cooking tasks both on the range top and in oven. The stove was purchased over 15 years ago and has been a GREAT oven. Then, a loud firework-like "POP" occurred, tripped the main house breaker and oven went dead. Evidently the original control board has a known issue with this sort of thing, and some online researching about the oven and this particular problem led me to Amazon and this replacement board part. Replacing the board has allowed this otherwise perfectly functioning oven to continue working, although it wasn't as easy to do without a critical tool I had to buy. I will quickly go through the steps & what I ran into, what I did to finish the install and get the stove back to operating. The board part arrived nicely protected within some bubble wrap and in a cardboard box. The part states it was made in Mexico which didn't lower my feelings any about it be a sub-par product as many many companies manufacture components in other countries which are then put into products for sale world wide. I removed the bottom drawer, racks and everything on top of the oven first, to lighten the unit up a bit. Furniture moving coasters (with socks) I placed underneath the two front oven feet which made sliding it across the linoleum floor without scuffing, a breeze. You might need another person to help with this. Double-Check the circuit breaker is OFF, and UNPLUG the oven from the wall. From here on out describes the steps used to fix OUR oven. You may have a different experience depending on model number or other factors. Accessing the blown control board required removing the metal panel from the back of the oven. Mine was made in two sections, so it was the top half. My first problem was that the screws fastening the panel were a Square Head type. I did not have a square-tip bit, nor a hex-driver bit that small to fit around the screws so I'd need to take a trip down to the local hardware store. I removed one screw gently with a pair of pliers and took it with me. A number 1 square tip bit fit, so I purchased that for a few dollars. Back home I noticed there were other holes around the edges NOT used for fastening screws. To avoid confusion I took a black magic marker and before I removed any more screws, I drew a little arrow next to the holes with screws in them...so I could find them faster during re-assembly. Find a little cup to put the screws into. Using a cordless drill with the new square-bit made easy work of getting the remaining 7 screws out of the panel. Removing the panel exposed the back top half of the oven and control board / clock assembly for the oven. Basically, there is a pin connector with wires you have to gently unplug from the bottom part of the board. There may be a couple pressure-clips you might have to squeeze to get the wires and connector to wriggle away from the board. Be careful not to bend the pins when removing this connector. Next were 5 wires running down the right side of the board. I took a small piece of masking tape and marked the wires "1" through "5" from top-to-bottom so I'd know which arrangement they were in. These wires have connectors you'll also have to carefully pull to disconnect. Once wires were removed I again noticed that the 4 screws holding the board itself in place were square head type and the same used as what was holding the back panel on. At least in my case, the same #1 square head bit fit and I was able to remove them with the cordless driver. Good thing I had bought the square bit, because the hard black plastic casing of the board unit would have made it almost impossible to access and remove the screws with a pair of pliers. Maybe whomever fastened your oven together used Phillips head screws, but alas, not on ours. Once screws were out, the board simply lifts away from the back of the oven. A cursory look at the two boards revealed connections for the wires between them which looked right, were marked right, and the buttons and LED lights of the old blown-out board's still adhered-on plastic face cover seemed to match the buttons and lights on the as-yet-installed new board. I was pretty confident this was the proper replacement board. That settled, I would have to get the old plastic face cover off of the old board and stick it onto the new board. A paring knife allowed me to gently get underneath a corner and use the flat of the blade to gently LIFT the plastic cover away from the old board. Don't try and CUT it off...just lift a little, wiggle forward, lift again. I wasn't sure what I'd run into adhesive-wise, but in my case the plastic cover was stuck onto the board just around the outside edges of the face cover...taking the knife and lifting a little , sliding it forward and lifting again repeatedly, allowed me to get the face cover of the original board off with no cuts, dents or damage to it. I suppose you could apply more glue to it when putting it back on the new board, but there was plenty of stick left to get the face panel to solidly adhere. - Note: Make sure you have the new board and removed face cover both orientated with one another correctly before sticking the face cover on...I almost put mine on upside-down! Once done, reverse the process you did to remove the old board. Screw new board onto back of oven, re-attach wires / connectors. Re-attach back panel. At this point I plugged the oven back into the wall socket and turned the circuit breaker back on. The Oven gave a "Beep!" sound, the display turned on, clock flashed as you'd expect. I let it sit there for a few minutes. No weird smells, no blue smoke coming from the back - the board seemed happy. I then shut the circuit breaker off again, returned the oven to its position against the wall and put the lower drawer back in place, replaced the oven racks. Circuit breaker back on, Oven went "Beep!" to state it's status as among the living once again - I set the clock, tested the range top...all 4 elements worked...put some marinated steak tips & potatoes into a little glass baking dish and used the oven to cook lunch at 350 degrees (delicious) - all worked fine. Thus far the oven has been functioning perfectly. Very happy a $200 dollar part was able to breathe new life into an appliance which should hopefully last another 15 years! Thank you Frigidaire & Amazon!
Scritto da: Amazon Customer
it was the right part for the stove!
This was a replacement for the control board on an electric range. It was a little difficult to center in the space provided but that was a factor of the range design itself, not the replacement part. It was shipped out and it came in quickly. Thank you! Bob
Scritto da: Family
Works great
Easy to install. Works great. It does not come with the overlay, so we re-used the one from the old control board.
Scritto da: ADK
It works!!
Much like the reviewer before me stated, my oven made a loud pop noise, kinda like a fire-cracker, and that's when my 10 year old Frigidaire electric oven quit working. I found this replacement board on Amazon for about $30-$40 cheaper than any of the other online appliance part suppliers, so I bought it. I was a bit nervous after receiving it and seeing that it is significantly different looking from the original board, but apparently the functionality is the same is it worked fine once installed. The beeper / alarm is slightly louder, and the beeps are slightly longer, but those are the only functional differences that I have noticed... insignificant really. My only gripe with this product is that the housing piece (black plastic that the board clips into) didn't come with the face-plate that has all of the button labels and is the part that you see when you're looking at the oven. This is understandable though since there are different colors / styles of face plate. With that said, I elected to swap the control board from the new housing into the old housing that still had the face plate on it, since that face plate is adhered to the old housing with some pretty substantial adhesive. I would have preferred if this control board came without the housing at all, or at least with the housing separate. The reason for this is that in order to remove the control board, I had to pry back some plastic tabs on the housing and flex the board considerably to release it from the housing. It would be very easy to damage the new control board if one isn't very careful in this process. The alternative to swapping housings is to swap the face plate, but then you have to worry about tearing or bending the plastic face when you're removing it. You have to make sure to align the face plate correctly when you reinstall it. And you have to find a suitable adhesive that will hold the face plate indefinitely. I love that this part was cheaper than anywhere else, and I love that it is / was Prime eligible, so I had my oven back up and running 2 days after the initial incident. I would buy it again if the need should arise. Update: After about a month of use, the first digit (left-most) in the clock / timer display stopped working. If I tapped on the face of the control panel, the character would light up or flicker briefly, and shortly thereafter, it stopped working altogether. I knew there had to be a broken trace or a cold solder joint so I went to work trying to find it. I pulled the board and inspected it closely but was unable to visually detect any defects. I started to re-flow all of the solder joints in the area of the display module but the problem still wasn't fixed. What I did to solve the problem ****I DO NOT RECOMMEND DOING... IT IS HIGHLY DANGEROUS AND COULD CAUSE SERIOUS INJURY OR DEATH****. I had to resort to plugging the board into the electrical power of the oven and gently flexing the circuit board in different areas while checking for the problem character to light up. I used this method to localize where the problem joint was. I then used my finger to move individual component leads to find the particular joint that was defective (it turned out to be an IC lead). I re-flowed that solder joint and the display now functions as it should. I've reduced my rating to 3 stars as I have lost a bit of confidence in the product.
Scritto da: Jennifer Macwaters
Was not programmable to manufacturer specs
we were cooking dinner in the oven when we heard a loud pop and discovered our frigidaire oven no longer worked. A little research led us to the main control board which we ordered and replaced. It was a quick and easy job and the oven worked again. Unfortunately it was a good fifty degrees off, would not follow the manufacturer reprogramming procedure and if you set it higher to cook at a proper speed it would not cook evenly. Returned the piece over a week ago but still have not received my refund...
Scritto da: Josee Lalonde
le numero de l'artic recu pas le meme que sur la commande.
artic pas compatible.

Prodotti correlati

Scopri il nostro network internazionale

Spediamo in 28 paesi, oltre 200.000 prodotti. Resta aggiornato, iscriviti alla newsletter.

Shopping Cart