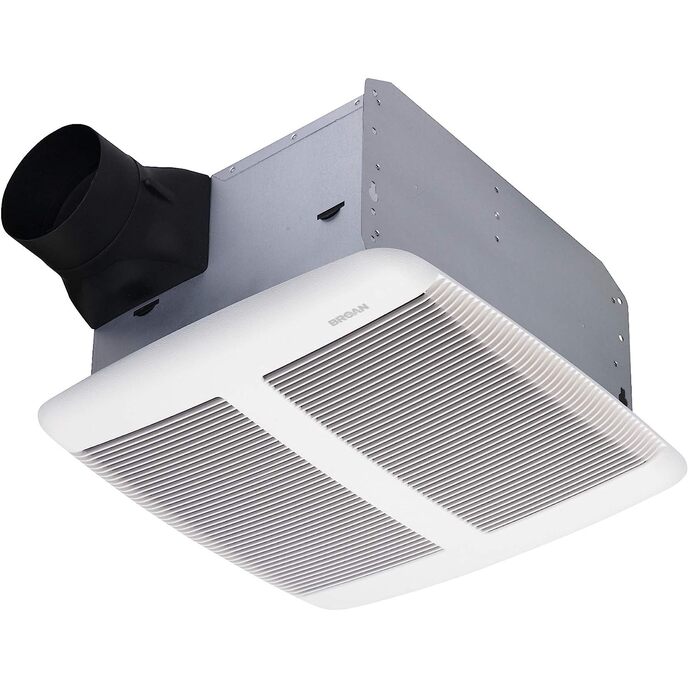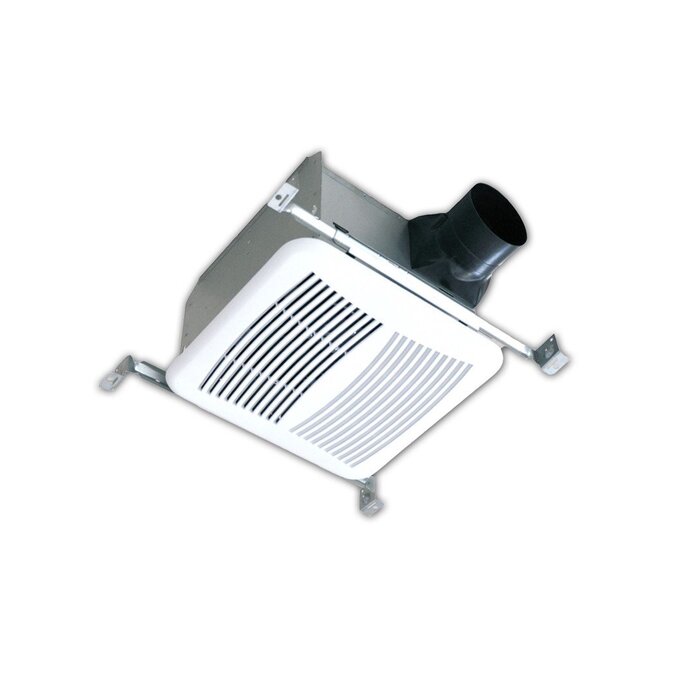
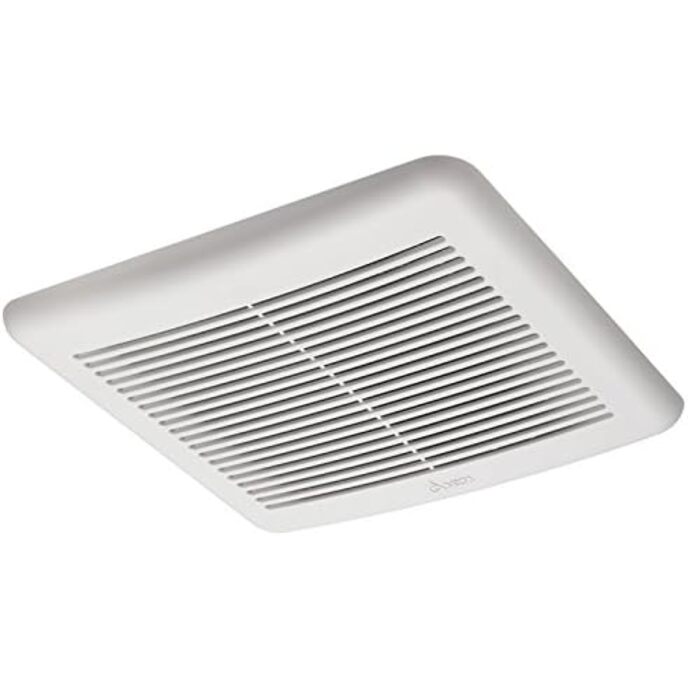
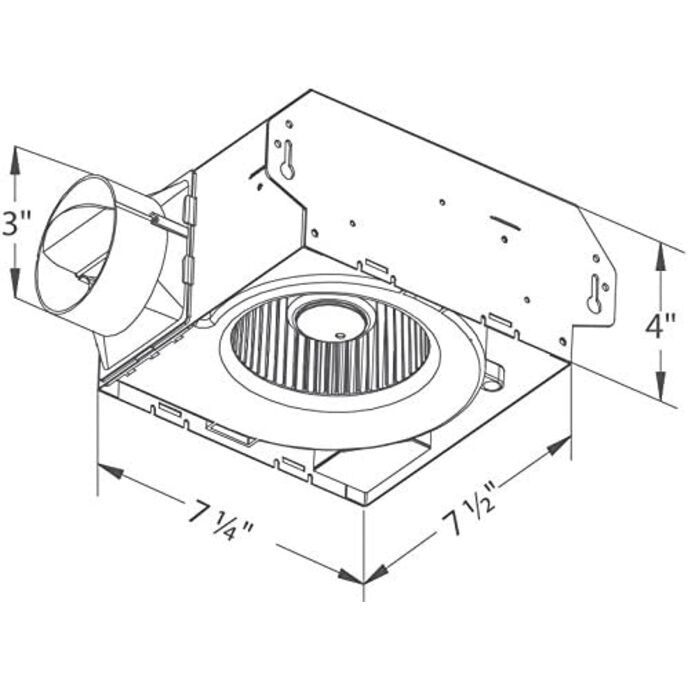
DESCRIZIONE DEL PRODOTTO Il Delta BreezSlim SLM50 è un ventilatore qualificato ENERGY STAR di dimensioni compatte, a basso rumore e dal prezzo conveniente. Perfetto per ristrutturazioni di case singole e grandi progetti multifamiliari. Certificato UL per l'installazione sia a soffitto che a parete. Si inserisce all'interno di una parete 4. Flusso d'aria di 50 CFM con valutazione del volume di 1,0 sone. Dispone di un motore DC brushless per un'affidabilità estesa e un basso consumo energetico. 6,4 Watt con indice di efficienza di 8,9 CFM per Watt. Qualificato ENERGY STAR e certificato HVI. DAL PRODUTTORE La ventola di ventilazione Breez combina diverse innovazioni di design, tra cui un alimentatore switching e un motore DC brushless per fornire una soluzione più silenziosa con un risparmio energetico fino al 74% rispetto a prodotti simili. La ventola di ventilazione Breez è facile da installare
EAN: 7241870572591
Categories: Strumenti e miglioramento della casa, Materiali da costruzione, HVAC, Ventilatori,
| Air Flow Capacity | 50 Cubic Feet Per Minute |
| Brand | Delta Breez |
| Color | White |
| Controller Type | Button Control |
| Country of Origin | China |
| Customer Reviews | 4.5 4.5 out of 5 stars 613 ratings 4.5 out of 5 stars |
| Domestic Shipping | Item can be shipped within U.S. |
| Electric fan design | Exhaust Fan |
| Finish Type | White |
| Included Components | Bath Fan |
| Indoor/Outdoor Usage | Indoor |
| International Shipping | This item can be shipped to select countries outside of the U.S. Learn More |
| Is Discontinued By Manufacturer | No |
| Item model number | SLM50 |
| Item Weight | 1 Pounds |
| Manufacturer | Delta Products Corporation |
| Material | Galvanized steel body |
| Model Name | SLM50 |
| Mounting Type | Ceiling Mount |
| Noise Level | 1 Sones |
| Power Source | dc |
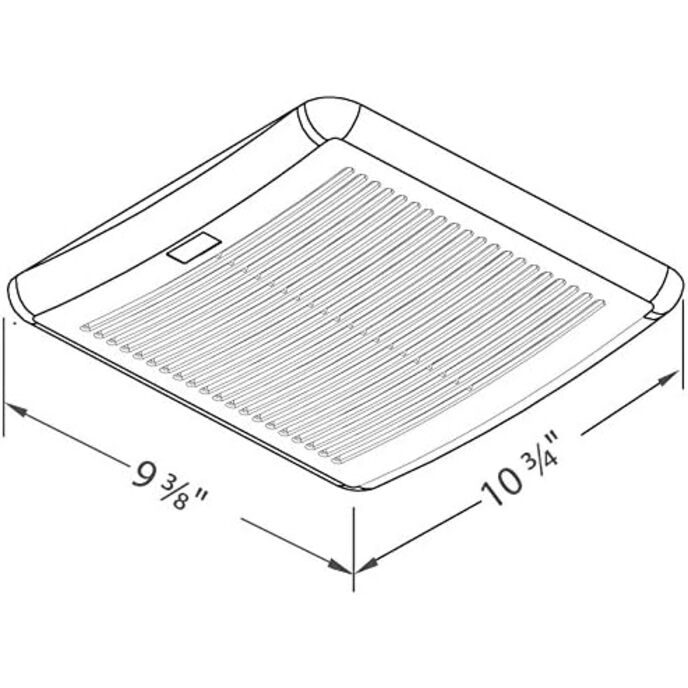
| Product Dimensions | 3.94 x 7.25 x 7.2 inches |
| Product Dimensions | 3.94"D x 7.25"W x 7.2"H |
| Recommended Uses For Product | Home |
| Room Type | Bathroom |
| Special Feature | Recirculating |
| Specification Met | Energy Star |
| Style | Fan Only |
| Voltage | 120 Volts |
| Wattage | 6.4 watts |